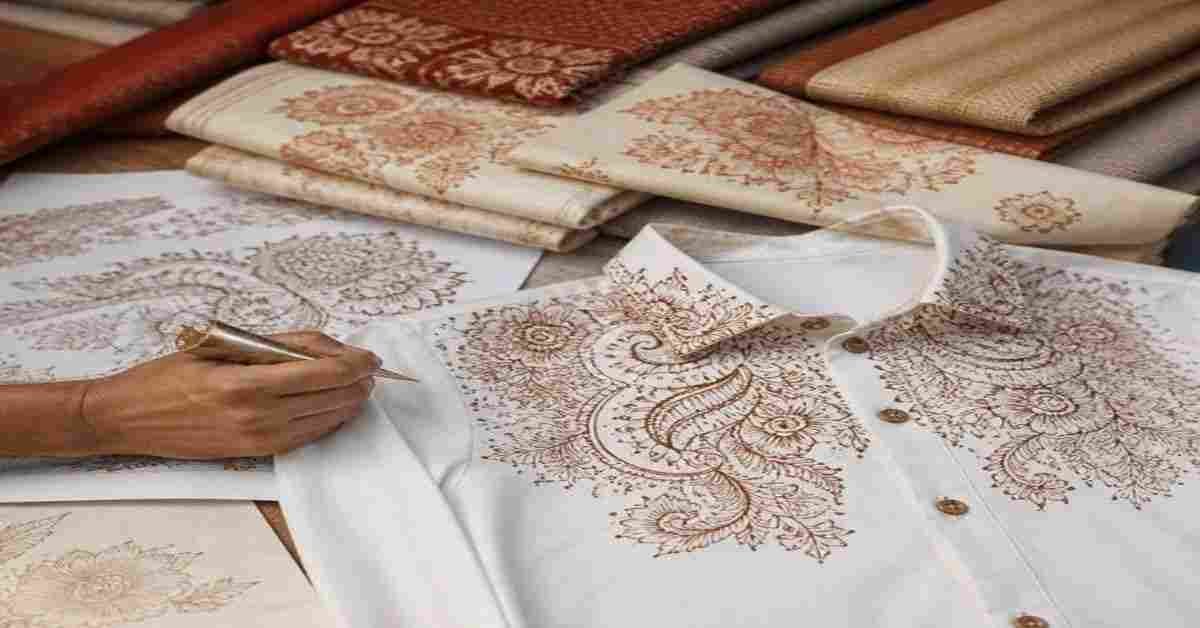
Mehndi artwork has always lived on skin for a week or two and then faded. But the same line work that looks beautiful across a palm translates remarkably well to fabric, and a growing number of brides, henna artists, and event planners are printing their favorite motifs on tees, crewnecks, and hoodies for mehndi night, bridal showers, festival stalls, and artist merchandise. The process is not complicated, but it rewards a bit of planning. Below is a practical guide to choosing motifs, preparing artwork, and getting shirts printed without wasting money on a batch you end up hiding at the back of a wardrobe.
Why Henna Patterns Print So Well
Henna design is essentially single-color line art. Paisleys, vines, mandalas, jaali net fills, and fine dotwork are built from strokes of consistent weight on a plain background—which is exactly what garment printing handles best. Most printed apparel designs are strongest when kept to one to three colors, and traditional mehndi already works within that constraint. A deep reddish-brown motif on a cream tee, or a white-on-black mandala across the back of a hoodie, reads cleanly from across a room without needing photographic detail.
The trade-off is scale. A pattern that fills a hand is roughly 15–20 cm across; on a shirt, a print area of 25–30 cm wide is typical for a front chest or full-front placement. Enlarging fine dotwork can make it look sparse, while shrinking a dense bridal pattern turns it into a grey smudge. The fix is to redraw rather than resize: pick the three or four strongest elements of the original design and rebuild them at the size you actually want on the garment.
Choosing the Right Motif for the Garment
Start with sketches you already love
If you are stuck on where to begin, look through the patterns designed for larger, flatter surfaces. The sweeping vines, central lotus arrangements, and symmetrical cuffs found in back hand mehndi designs adapt to apparel far more easily than intricate finger work, because they are already composed around a single focal point with breathing room at the edges. A back-of-hand mandala, lifted and centered on a chest print, often needs almost no redrawing beyond thickening the thinnest lines.
Match placement to pattern shape
- Circular mandalas: center front, center back, or large on a hoodie back panel.
- Trailing vines and florals: run them down one sleeve or along a side seam for an inked-arm effect.
- Cuff and border patterns: use them as a horizontal band across the chest or just above the hem.
- Single paisley or bootie motif: small left-chest print, which looks far more expensive than it costs.
Add words carefully
Text plus a dense pattern competes for attention. If you want “Bride Squad,” a date, or a family name on the shirt, give the lettering its own clean zone—above or below the motif, not inside it—and keep the font simple. Script fonts with hairline strokes tend to disappear next to bold henna lines.
Preparing Artwork That Actually Prints
Most disappointing shirts are disappointing because of the file, not the printing. A few habits prevent that:
- Draw on paper with a fine black pen, then photograph in flat daylight and raise the contrast until the background is pure white and the lines are solid black. No grey halos.
- If you can, trace the scan into vector form so it stays crisp at any size. If not, work at 300 dpi at the final print dimensions—not at thumbnail size and enlarged later.
- Thicken your thinnest strokes. Lines that look delicate on screen can break up on textured cotton.
- Decide your color count early. Reducing a design to one, two, or three flat colors usually makes it look sharper, not poorer.
- Check the design against the garment color. A reddish-brown henna tone that sings on natural cotton can vanish on maroon.
Always ask for a digital mockup before production. Seeing the motif sitting on a shirt shape at true scale catches the two most common errors in seconds: a print that is too small and lost under the collar or one so large it runs into the seams.
Finding a Printer Who Will Take a Small, Specific Job
Event apparel rarely arrives on a comfortable schedule. The motif gets finalized after the outfits, the guest count changes twice, and someone’s cousin confirms three days before the mehndi. That is where ordering locally and without minimums matters more than shaving a little off the unit cost. In the Phoenix area, for example, Fast Shirt Factory handles custom t-shirt printing Phoenix clients bring in at any quantity—one shirt for a bride or a full run for a family, with artwork uploaded or built in their AI Design Studio, a digital mockup approved before anything is printed, and same-day or deadline-based production on qualifying orders. For a henna artist who also sells merchandise at markets, the useful part is the reorder support: stored logos and sizing mean the second run of a design that sold out does not start from scratch.
Beyond the Wedding: Motifs as a Small Apparel Line
Henna artists sit on an archive most apparel sellers would envy: hundreds of original patterns, already drawn, already tested on real clients. Printing a short run of shirts or hoodies is a low-risk way to test which designs people want to wear rather than just wear temporarily. Before committing to inventory, it is worth reading a straightforward breakdown of how to start a t-shirt business, which covers niche selection, pricing, and fulfillment decisions in order. The short version for artists: print a handful of your three strongest motifs, take them to one event, and let sales tell you what to reorder.
A Short Pre-Order Checklist
- Final motif redrawn at true print size, lines thickened, background pure white.
- Color count locked—one to three flat colors is the safe zone.
- Garment color chosen against the ink, not against the outfit photos.
- Size list collected in writing, with two spare shirts in the most common size.
- The mockup is approved, and a ready-by date agreed before the event week starts.
Do those five things and the shirts become part of the celebration rather than a last-minute scramble—and the pattern you drew on a palm gets to last a lot longer than the stain.

